The dashboard is super easy to navigate. Once you get registered as a Vendor on the How To Buy SAAS marketplace, listing your products is a seamless process, and selling your product with fixed and variable pricing subscriptions.
This blog will take you to the step-by-step process the dashboard offers you as a vendor. Also, the functionality allows you to manage and sell your products in specific categories.
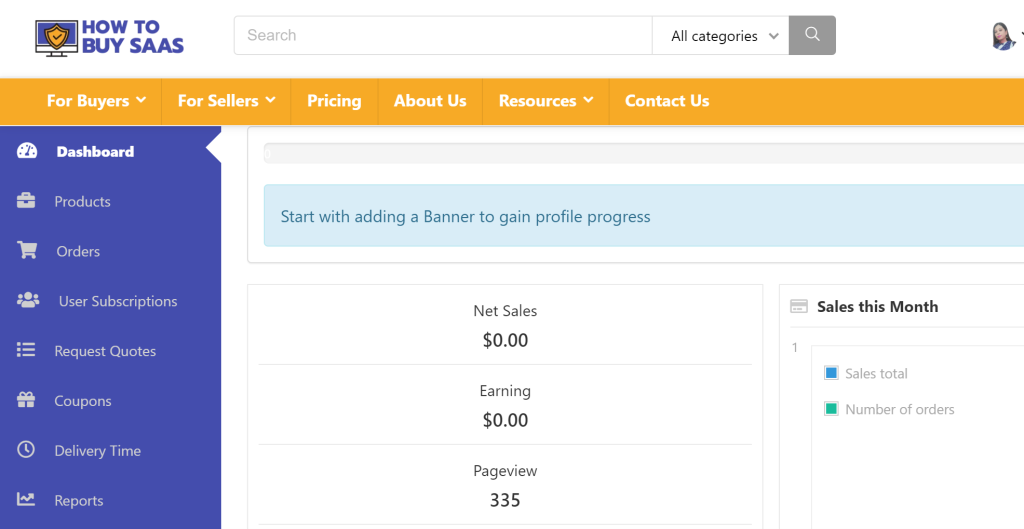
Table of Contents
Maximize Your Vendor Dashboard
Let us begin with understanding the different features that a vendor dashboard of How To Buy SAAS offers to the vendor, from creating the product, categorizing it into single and variable, and selling it by redirecting it to the external website.
1. Listing of SaaS
Once registered as a Vendor, the first step is to create the product(s) on the Vendor Dashboard. The steps are listed below to create a product:
➡️Go to your vendor dashboard.
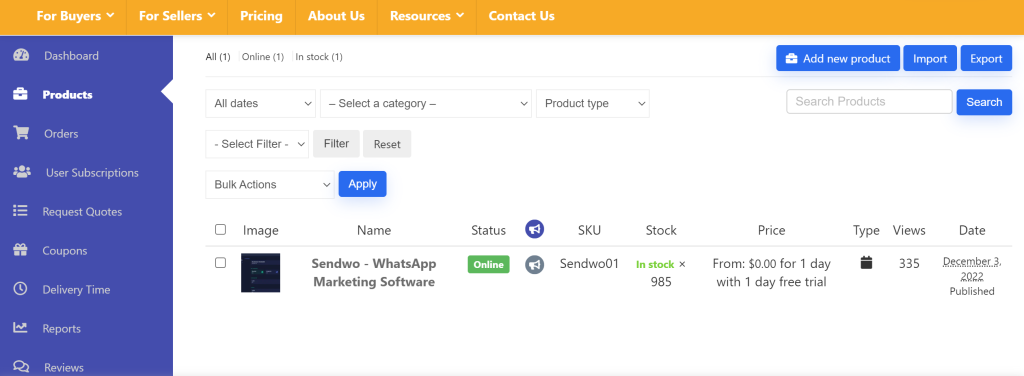
➡️Click on the “Products” tab in the left-hand menu.
➡️Next, click on the “Add New Product” button in the top right corner.
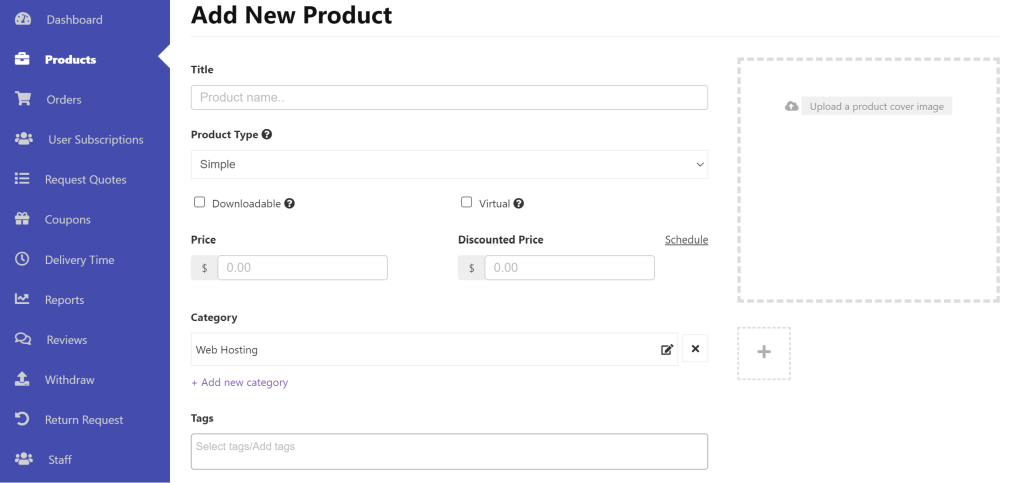
➡️A new window will open where you can enter all your product details.
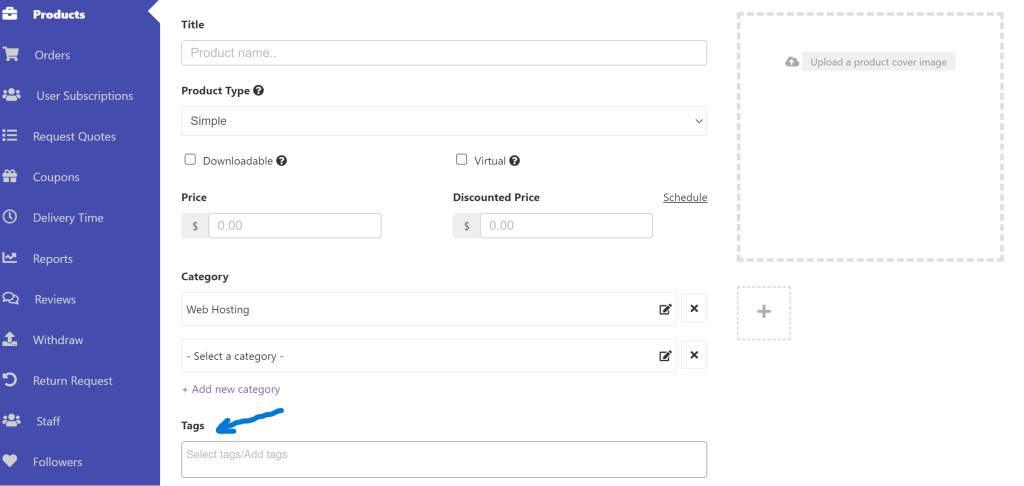
1. Product Details
☑️The details related to the title, price, description, or any discounts offered( optional).
☑️Suppose it has any start date or end date with category or tags. All details need to be provided by the vendor.
📌Categories and tags are only created by the Admin. Vendors can only select them from the frontend dashboard. This is to prevent duplicates.
2. Category Selection
The category selection is singular in the dashboard by default.
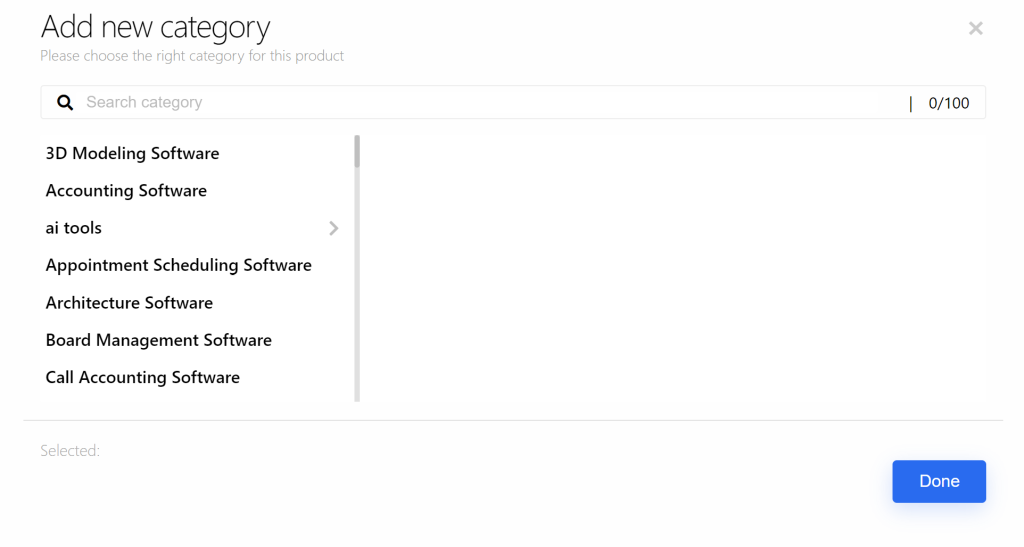
Since, as per best practices, only one category can be assigned to the product.
☑️But at the same time, it offers a drop-down option for the vendor to select other variables.
If you need to show your products based on multiple factors or for searching or sorting features, you can use tags.
➡️You can use tags for showcasing the products on variable factors through the drop-down option.
For multiple categories in your single product, follow the steps as:
Dashboard > Settings > Selling Options > Category Selection.
The dashboard enables the vendors to simultaneously edit the products while creating new categories.
3. Create Tags
Vendors can create tags for the products.
➡️Just navigate to the Vendor Dashboard > Product > Add New Product.
➡️And in the option, Select the Product Tags field > Add a tag > Press Enter.
➡️Once you finish the above process, click the “Create Product ” button. Now, you will be redirected to the product editing page, where you can add new information to your product.
➡️A product page has been created on your Vendor Dashboard. Now it’s time to Opt for a product as a single or variable product.
2. Selling Products as Single/ Variable
Let us first understand the fundamental difference between a single product and a variable product.
Single products are the ones that are simple and do not have any different variants, whereas variable products have various forms or variants.
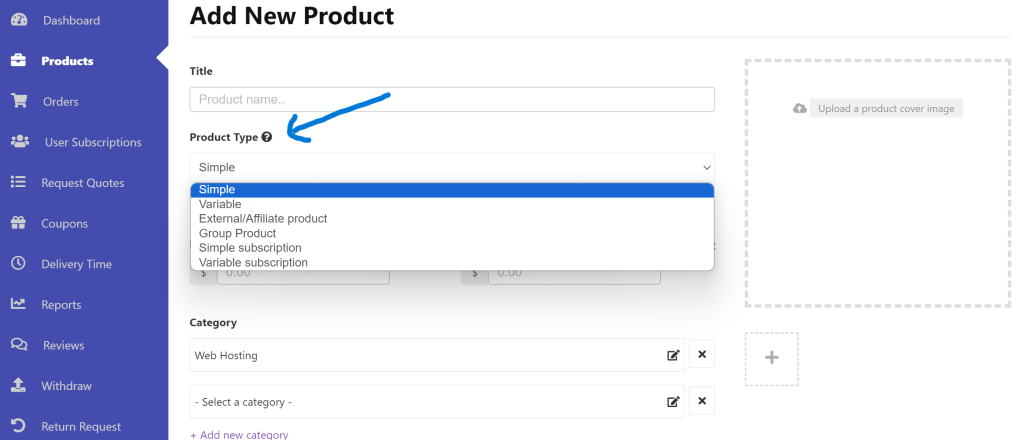
For example, you can sell software that offers three different packages, and the clients purchase it as per their requirements. This means you have variations to the product.
Now, you must be wondering how to bring variation to the dashboard for the variable product.
Just follow the steps given below:
➡️Start by selecting “This Product Has Multiple Options.” This action will reveal new fields where you can input your variations.
➡️For entirely unique variations and attributes, opt for “Custom Attributes” and then click “Add Option.” This will open two blank fields where you can define the variation name and attributes according to your preferences.
➡️Feel free to add as many variations and attributes as needed for your product. Once you’ve finished, check the box that says, “Create variation using those attributes.” This action will prompt the system to generate all possible combinations, and you can then proceed to set prices for these variations.
☑️If you wish to disable any variation, simply uncheck the box on the left.
☑️Please note that the functions to add quantity and variation pictures won’t be available immediately.
➡️To access these options, save the product first. After saving, you’ll notice a pencil icon on the right side of the fields above. Click on it to add more details and enhance your product variations further.
Inventory and Variants
You are supposed to navigate this section if the product is variable and fine-tune every small detail of the product.
Let us first understand the SKU, which is the Stock Keeping Unit, or in simple words, stocks of the variable product that will be showcased in the dashboard.

Enabling Product Stock Management
☑️Activating Stock Management will allow vendors to manage the stocks.
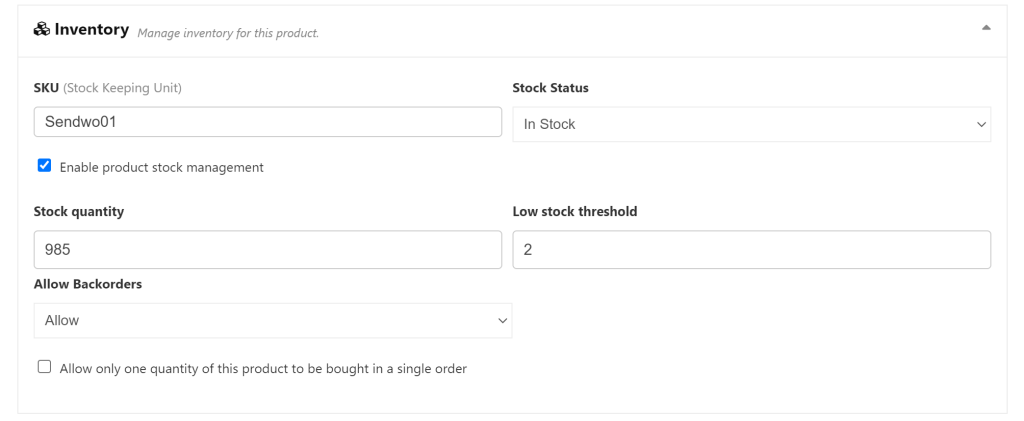
Suppose there are 20 pieces of product, and you want to avoid receiving orders of more than 20 units. This can be done by activating stock management and entering ’20’ in the quantity field. Also, once those 20 units are ordered, a message appears indicating that all quantities have been sold and no more stock is available. This way, the vendor can control over the inventory and prevent overselling.
➡️However, for accepting pre-orders, you have the option to “Allow Back Order.” This allows customers to place orders even if the product is currently out of stock.
3. Sell the Product by redirecting to your Website URL
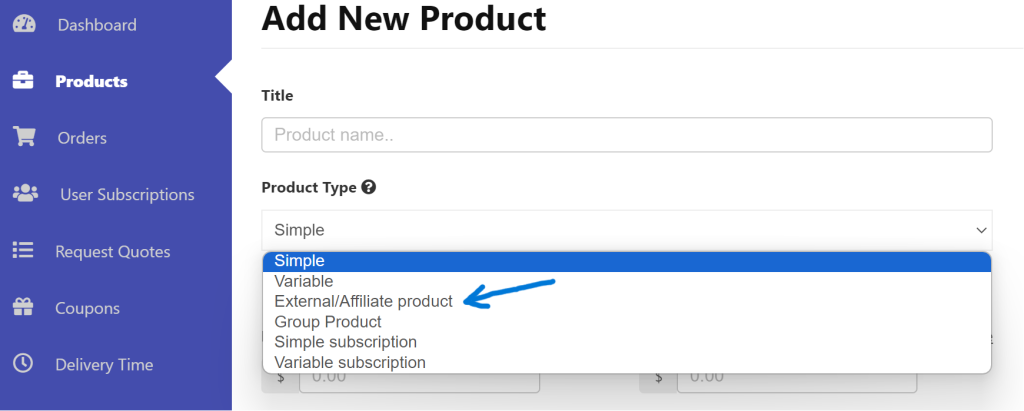
The vendor can effortlessly sell products through redirecting to your own websites. This can be done by showcasing the products as External/Affiliate Products in the dropdown menu. Include the link to your website in the URL section and give a name to the button.
4. Live Chat Support for the Product
The dashboard offers a valuable service to its vendors by incorporating live chat support directly onto the product landing page. This feature seamlessly integrates with Facebook Messenger chat, WhatsApp chat, or Tawk.to facilitate user/vendor engagement with visitors in real-time. It enables vendors to monitor visitor activity and provide immediate support as needed. To set up this feature, follow these steps:
➡️Vendor Dashboard>Setting>Live Chat.
➡️All you need to do is activate the checkbox “Enable Live Chat” to access this feature.
Note: Only registered users/customers can use live chat.
Here are a few key points to ponder:
☑️The vendor will instantly receive the customer’s messages on the vendor or product page.
☑️Vendors also have the option to enable Desktop Notifications. This way, even if they’re working on another tab. To make this feature work, all the vendor needs to do is keep their browser tab open. Once someone sends them a message, a handy pop-up notification will appear, ensuring they stay in the loop.
☑️Customers and vendors can also add attachments like screenshots and files with their messages.
Let us quickly understand how it seamlessly works in all the three interfaces- Facebook, Twak.to and WhatsApp.
Simply Navigate to the Live Chat settings and choose the Facebook Messenger option to activate Facebook Messenger and save the changes.
Vendor Dashboard>Setting>Enable Live Chat, Facebook Page Id>Update Setting.
☑️Tawk. to
Follow the steps below to successfully integrate Twak. to the vendor page.
➡️Step 1: Create a Twak.to account and sign-up. It is a free software.
➡️Step 2: Create a property on your tawk.to account to get the chat widget for tawk to property and widget ID.
➡️Step 3: Add necessary credentials like Property name, URL, and Widget name to finish creating the property. Click on Done once the process is complete.
➡️Step 4: Click on the Add-Ons button > Click on the Add-Ons button. Now, you will get the property ID and the widget ID. Just Copy it.
➡️Step 5: You need to paste the tawk.to property ID and widget ID on your settings. Go to your vendor dashboard and click on Settings.
➡️Step 6: Now, scroll down and enable the Live Chat option. Then paste the tawk.to property ID and widget ID in the textbox. Click on “Update Settings” to finish.
You can also test the integration by creating an incognito or a dummy user on your page. There, click on the Chat Now option and test the integration.
➡️Vendor Dashboard >Setting > Enable the Live Chat option > Add your WhatsApp number in the textbox > Click on Update Settings >Finish.
5. Manage your Subscription Orders
- The Order page on the Vendor Dashboard will show all the details related to the order number, order total amount, earned amount, order status, customer details, order date, and order action.
- There is an option to filter the order as per the date and export the list of orders.
- The dashboard also allows the vendor to access and manage the order status directly from the order listing and mark the order as completed through this action.
- The vendor can also add notes to their clients that are entirely private. For this, the clients will also receive an e-mail notification.
Stand Out as a Vendor with These Exclusive Features
Some of the other vendor-friendly features of the How To Buy SAAS marketplace are listed below. The features not only streamline the operations but also make a standout for your product.
1. Customer Reviews
The vendor dashboard allows your customer to rate and share the honest thoughts and experiences through the review page.
➡️There is an option of “Write a Review” when the customer scrolls down to the product page.

This will help to generate prospective customers based on positive and detailed reviews. You can also connect and collaborate with the team of How To Buy SAAS to improve the product review. The team will work closely to gather constructive feedback to highlight the software’s strengths, creating trust. This will not only improve the product’s reputation but also establish stronger connections with potential leads.
2. Special Sale
The dashboard allows you to manage any special sales and offerings while selling your subscription with How To Buy SAAS.
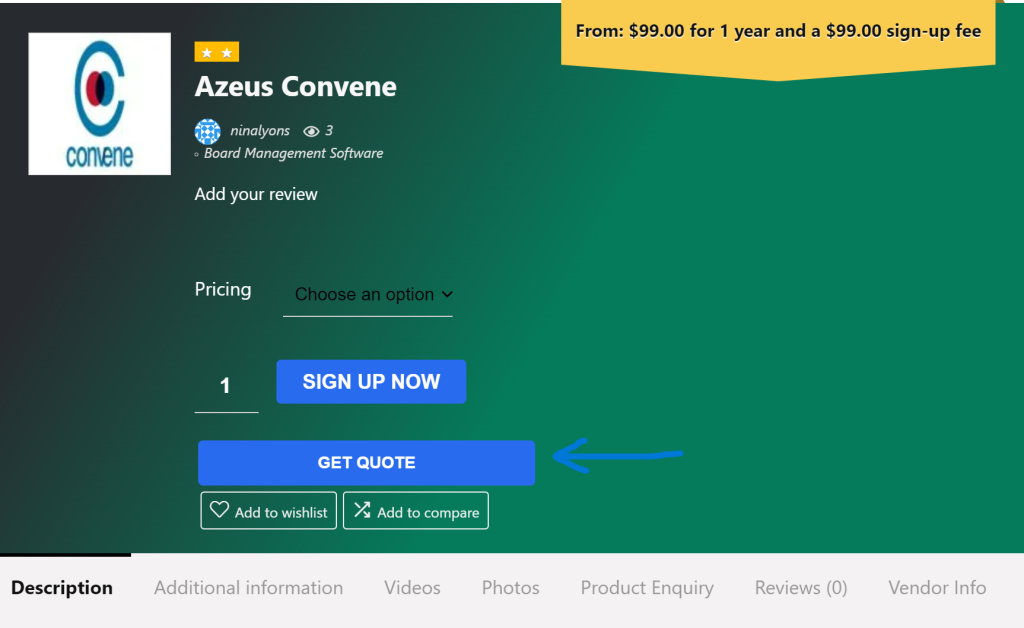
3. “Get Quote” Option
Through the dashboard, the customer can opt for “get quote” options from the product page. This helps you to get leads from prospective clients/customers.
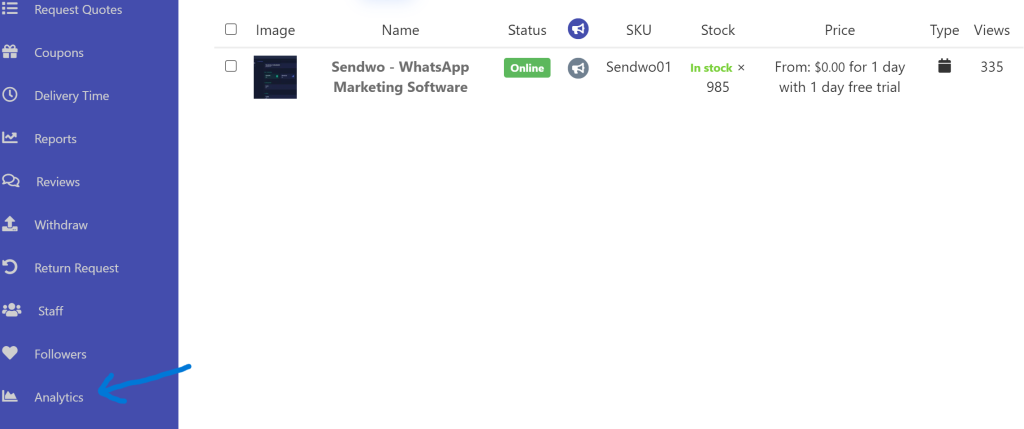
4. Analytics & Report
The vendor can also monitor the real-time data and sales performance with the other valuable key insights on the dashboard. Also, one can explore the analytics and detail reports for the product page since it has been integrated with Google Analytics and Google Search Console data.
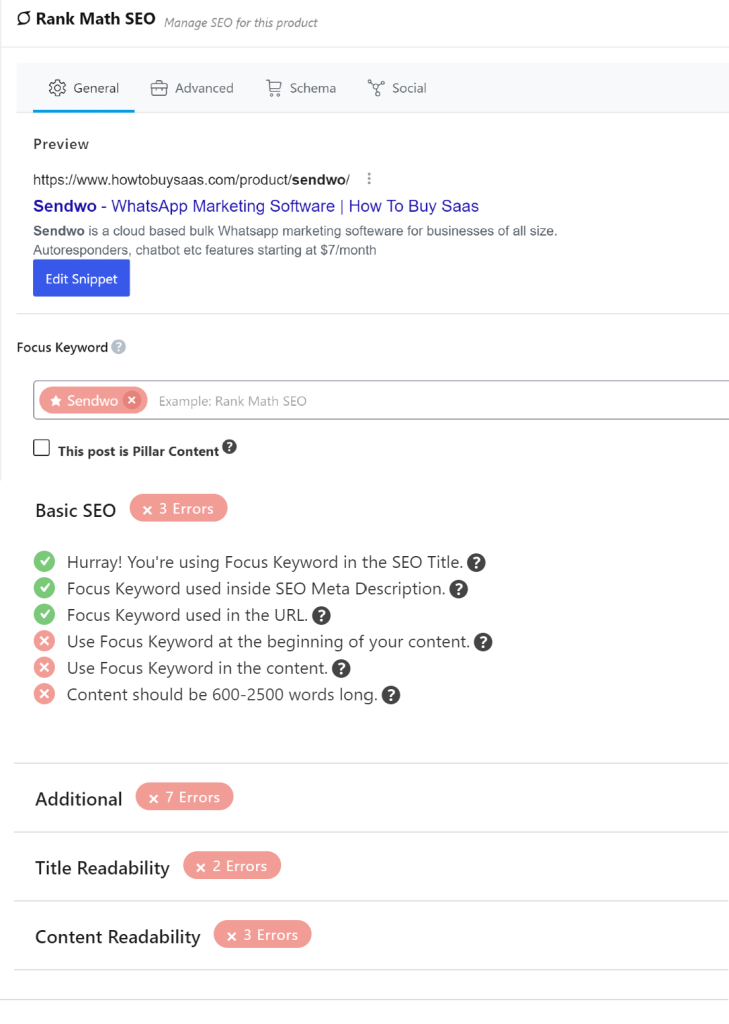
5. Optimize product page for SEO
The dashboard allows the vendor to optimize the product as per SEO. This helps to drive traffic to your product page.
For the purpose of On-Page Optimization, the vendor can again connect to the team of How To Buy SAAS.
6. Advertise the product in the specific product category
The vendor can manage the product as simple or variable products through the dashboard. Also, if you wish to advertise the product, highlight the unique products in a site-wide, customizable advertisement can be made.
While scrolling down the edit product page, there is an option to advertise your product. Once the changes are made. Just click on to Save Option.

7. Manage payments and refunds
Through a simple configured payment gateway, your customers will be able to pay for the products effortlessly. At the same time, if anything goes wrong regarding payments, the customers can easily get refunded almost instantly.
8. Publish guest posts on HTBS
Vendors also have the opportunity to make the most of How To Buy SAAS’s guest post service. This valuable service provides a platform for vendors to explore exciting marketing collaboration prospects with How To Buy SAAs. We firmly believe in creating a win-win scenario where vendors can not only showcase their offerings but also actively engage with our audience. Also, contribute to a collective pool of wisdom, thereby generating fresh leads for their businesses.
Final Takeaway
The How To Buy SAAS vendor dashboard offers a comprehensive set of tools and features that empower vendors to effortlessly list the products, sell them, and manage the products. From seamless product creation to advanced features like live chat support and analytics integration, the dashboard provides vendors with everything they need to thrive in the SAAS marketplace and foster strong customer relationships, ultimately leading to success.


